
.
I often get asked where the linen print (below) in my bedroom was from, which is super flattering as it was a really simple diy I threw together on a whim a few years ago. I have a similar space in the living room that I’m bored with and been thinking of changing the print for a long time. I’m always looking at minimalist designs online but having trouble committing to just one, so I thought that I would make something for the interim and am pretty pleased with how it turned out. I did this as a part of Get Creative week for the library I work for and am sharing how I made it on the blog today.
.


.
I will be sharing a couple of creative crafts I’ve been up to over the last week, of you saw my last post I’ve been discovering new creative pursuits during lockdown and I have some more up my sleeve to try. With so much more time at home this is just the kind of tranquil activity I’ve been craving to provide a moment of escapism within the daily routine. In some ways it feels like the time in lockdown has flown by, don’t you think? But with a five year old in the house it’s becoming more fraught as time passes so I’ve been looking for ways I can spend a quiet hour re-balancing on a task that doesn’t ask for much out of me and today’s print was just that.
.

.
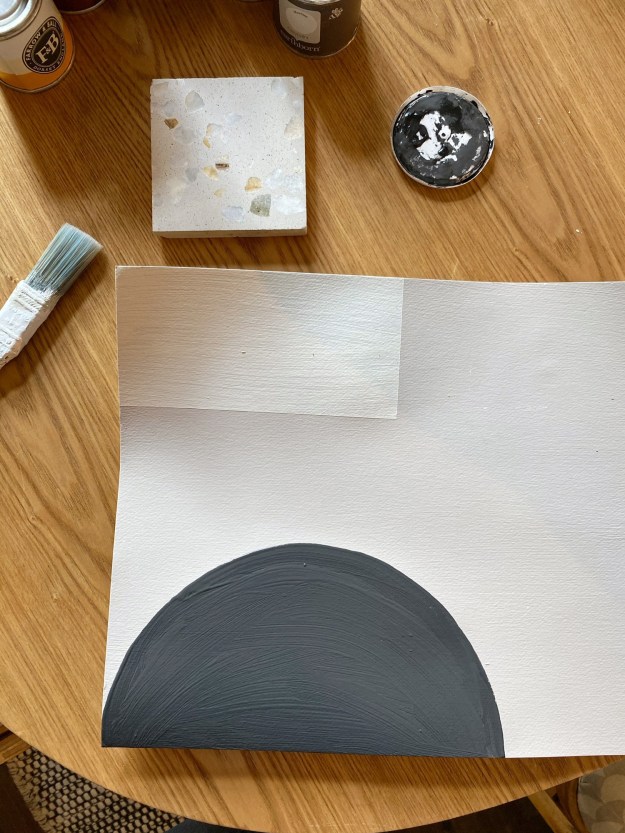
The beauty of this diy is that it doesn’t require many tools, and most will be commonly found around the home. Some paper (I used watercolour paper as I like a bit of texture), old tester pots of paint, a ruler, decorators tape, some plates or a compass (I am indebted to my friend Emma Jane Palin for the compass tip) and some decorators tape. This (below) is how I made this weeks print, I didn’t document the previous one but all you would need for that is decorators tape since the shapes are far simpler. My design is very simple but you could have lots of fun with more vibrant colours, a variety of shapes and even overlap. It’s really up to you how you want your design to look, I made this Pinterest board of beautiful shape composition I was drawn to before I began.
.

.
You will need:
- a sheet of paper
- some brushes
- paint (paint sample pots work well).
- decorators tape
- something to make shapes with – i.e a maths set with a compass Or a selection of household shapes e.g plates for circles.
.

.
Research
Have a look around for inspiration, I really love minimalist prints at the moment so that was my inspiration, you can see some of the patterns and combinations I like here.
Look online for inspiration, make a Pinterest board of shapes and patterns that interest you.
Think about how you may want elements to look on your print (without directly copying a complete work).
.

.
METHOD:
Paint your piece of paper in a background colour you love, I used Grouse by Mylands as it’s one of my favourite neutrals.
Play around with shapes on your piece of paper before you begin to paint. Draw out your shapes in pencil, I marked three curves as I wasn’t sure if I wanted a small circle with a larger shadow or a larger circle and I figured I would be more sure once I’d started painting other shapes in.
.
.
I drew around a small ruler for my lines, a compass for circles and decorators tape for the rectangle. The trick with decorators tape is to remove it as soon as your surface is painted (before it’s dry) so start with the sections you are taping.
Paint circles freestyle using your smallest brush for the outer line, a little messy is more authentic, you aren’t trying to recreate a digital print!
.

.
Leave your work to dry in-between layers
Asses your design after each shape is added, mine is minimalist but you may want to start with a few shapes and then build.
Et voila, when you’re happy with your print, frame it!
.


